by Outreach Assistant Brandon Regier
Things can quickly go wrong in the backcountry. Mountainous weather can change on a dime, disorientation can set in, your overly ambitious goals can catch up to you, and the list goes on. In the recent news, 21 runners lost their lives during an ultramarathon as a consequence of quickly-changing weather conditions. Only a few hours into the race, more than 1200 rescuers were being dispatched. In such remote locations, being prepared can make the difference between life and death - or even just fun and misery.
An ultramarathon runner myself, my hardest lessons learned have resulted from being faced with treacherous weather, hypothermia, and a lack of being prepared.
A number of years ago, I was roughly 75 kilometres into a 125-kilometre ultramarathon near Grande Cache when a storm hit. The racecourse encompassed three mountain summits, a raging river, and a whole lot of spectacular views, all while chasing a 24-hour cut-off time. This wasn’t my first summit, first race, or first time in the mountains. It was, however, my first time on a mountain summit at dusk caught in a snow-sleet-rain-hail-lightning storm. It was also my first time descending a mountain in the dark with headlamp issues and hypothermia, all while being absolutely soaked to the bone. As a runner, I typically pack light, meaning I carry the bare essentials. That night I learned a lot of lessons the hard way. Through these experiences, I have gained an appreciation for — and now know the importance of — quality gear, as well as the simple pack additions that have proven themselves since to get me to my destination with an ear-to-ear smile.
As an avid recreationist who is also in the process of getting certified as a Search and Rescue team member, I have been able to add tools to my toolbox through training and first-hand experience. I do not classify myself as an expert; nonetheless, my hope is that the next time you are out exploring in the watershed, you can incorporate some of my tips, tricks, or considerations into your next adventure.
I saw the storm approaching as I reached the summit. Having already been on my feet for 15+ hours, fatigue was setting in. As a long-distance runner, I dedicate a lot of time to training in order to challenge my physical and mental capabilities to the extreme. The storm was brewing to the west as the sun was setting. A few kilometres earlier, prior to things getting serious, I had been lucky enough to meet up with a couple of runners whom I knew well, and we were keeping each other company on the trail (this is an important aspect; you will soon see why).

The Mount Hamell fire lookout station near Grande Cache, AB. Photo by Brandon Regier, 2018.
When approaching the summit of Mount Hamell, you are above the tree line and ascending a number of rocky shale switchbacks (where the trail zig-zags so you don’t have to run straight up), leading to the beautiful summit where you follow a spiny ridge to the east. From there, the racecourse heads back west past the fire lookout tower, down more switchbacks, to the tree line. This is where you find yourself on the opposite side of the mountain, looking towards town.
As we approached the switchbacks and the trees thinned out, the rain started spitting. I threw on my rain jacket (the only rain gear I had with me—this was my first mistake). An average running backpack is under 10 litres, in comparison to the larger hiking packs ranging from 25 to 100-plus litres of capacity. I could use space as an excuse for my lack of gear; however, this is a poor justification where some very light and small items could have been added to save me from what the next hours had in store.
At this point, we trudged onward to the summit and made our way along the ridge to clock in (clocking in allows race staff and our crews to monitor who is on the course and where they are situated – this acts similarly to a SPOT or InReach device). We all shared some salted baby potatoes, snapped a photo (another mistake), then continued west. The wind and rain were picking up; we had been worried about a photo when our first priority should have been to descend the mountain immediately.
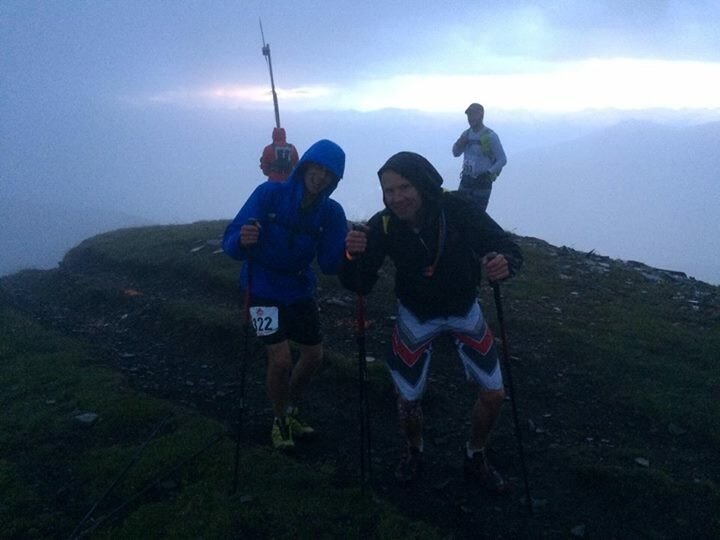
The photo we snapped at the summit prior to the full unleashing of the storm. Photo by Cameron Hagel, 2016.
story To be continued…!
Read on for Brandon’s lessons learned:
Lesson 1: Know your limits
I fully prepare when it comes to my adventures and don’t commit to these extremes without physically being ready. This is a concept that I apply to every race I sign up for. I fully believe in pushing myself—yet only within my personal limits and for what I have trained. This requires me to be honest with myself and to slowly build up to my end goal or adventure. Sometimes this means baby steps in an effort to be realistic.
Ensuring that your intentions are not overly ambitious and potentially dangerous is key; this requires research and planning. Whether it be your first overnight backpacking trip or first mountain scramble, know what you are stepping into. Consider the time of year and what hazards may be encountered along the way. Are snow or avalanches a possibility? What temperature extremes will you expect? How long is the route/ trip? Is it manageable within the allotted time (is this an out-and-back with one direction being faster/ slower)? These are some questions to consider. I would highly recommend creating a checklist that fits what you expect to come across and discussing it with your adventure partner.

Know your limits when it comes to hazards you may encounter on your adventure. Photo by Brandon Regier, 2020.
Lesson 2: Gear
“There is no such thing as bad weather, only bad clothing.”
This is a concept that I have learned the hard way. Although some weather is just plain bad, the gear is what can make a world of difference and what may be the dictating factor between being rescued, lost, or in a life-or-death situation. Having the right gear is part of being prepared in the backcountry.
A study completed in Yosemite National Park looked at 10 years of search-and-rescue events and explored the factors that could have prevented such incidents. In 13% of occurrences, patients felt better gear would have prevented Search and Rescue being called, and 14.4% said they were unprepared. This study concluded that a lack of water and improper footwear were main contributors to such incidents.
It is easy to become complacent when heading into the backcountry. In my case, this was not a ‘new venture’; it was something I had been training and preparing for! Pack light, but pack smart. Do not eliminate your pack essentials. A few pieces of equipment I wish I had on the mountain that night were a space blanket and rain poncho. Each one of those items weighed virtually nothing, but I can tell you from personal experience that a plastic rain poncho has saved me more times than I can count since this event. You may not be the most stylish wrapped up in plastic, but you will be dry, warm, and ready to continue when the storm passes.

Bringing gear essentials can mean the difference between a fun adventure and having to call for Search and Rescue! Photo: Kayden Regier, 2020.
Be smart when you choose your gear. Consider Gore-Tex items for rain protection, thin wool layers when colder temperatures are a possibility, and breathable clothing for those hot summer days. Proper-fitting gear is also critical when out exploring our backyard, specifically your pack and footwear. Ensure your footwear has sufficient room for your toes, isn’t too loose around the forefoot and heel, and provides ankle support. Proper fit is essential in eliminating uncomfortable chafing and hotspots. Also, ensure that your pack is large enough to hold all of your essential and ‘nice-to-have’' gear (such as a camera).
Lesson 3: Smart Practices, Start to Finish!
As recreationists we have to do our due diligence in navigating and creating a trip plan. Navigation can cover a number of things such as maps and compasses (ensure you know how to use them), as well as safety devices like inReach or SPOT devices, or even your cell phone. Each has its strengths and limitations. Electronic safety devices are fabulous and 110% worth the expense. They work off satellites and have SOS options for emergencies. However, battery life should be a consideration. As a backup, I always carry my cell phone with me, but its use is dictated by reception and once again battery life. Consider a waterproof case or a couple of heavy Ziploc bags to prevent water damage.

There are numerous tools for navigation and communication in the backcountry, from cellphones to 2-way radios, GPS, and InReach or SPOT devices - but your most valuable tool in the backcountry is your brain! Photo by Brandon Regier, 2021.
Leave a trip plan with a trusted family member or friend who is not with you. It should describe all the pertinent information to your journey. Include details such as when you intend on leaving and arriving, where you are going (including maps with a route), and everyone on the trip. In the case of an emergency, this will give all emergency personnel a starting point of where to find you.
One additional practice I firmly believe in, although it may be dictated by the specific location or logistics of the trip, is hiding your keys somewhere in or around your vehicle and making all individuals of your party aware. This takes away the possibility of losing the keys along the trail and being stranded, and secondly, in the case of an emergency where one member of the party needs to use the vehicle (for multiple different reasons), the keys are at the disposal of all members.
Lesson 4: Your Mental Game
The mental game involves constantly being on your toes, thinking and prioritizing as situations arise. In my ultramarathon scenario, the weather was worsening as every second passed, and we had prioritized getting a photo at the summit rather than getting to safety immediately.
Weather in the backcountry should not be underestimated. It is constantly changing and can switch 180 degrees in a split second. Before heading on your trip, it is never a bad idea to check the weather—however, use the forecast as a guide and still prepare for the worst. Consider checking the nearest weather station data to be as specific as possible.
When situations do arise, we have two options as backcountry users: try to get out/back to safety or stay put/carry on as best we can. In my case, getting off the summit was – or at least should have been – my first priority, alongside constantly assessing my condition and the changing environment.
If an emergency arises, you need to stay calm, think through the situation, and be resourceful. Work together as a group, and focus on keeping morale high. Every incident will look different and therefore there is no universal formula. That being said, remaining alert to your surroundings while ‘making the hard call’ to e.g. turn around, may be in the best interest of everyone's safety.